How to install xshell and connect antminer chips fixture
News 2023年2月23日 691
To use the test fixture, you need to prepare the following software:
1: Xhsell5 or Xhsell6
2: USB to TTL driver
We offer downloads: Xshell and USB drivers
After unzip the downloaded file, you will get Xshell and USB driver files separately
All we do is install them separately. During this time, please turn off your antivirus software.
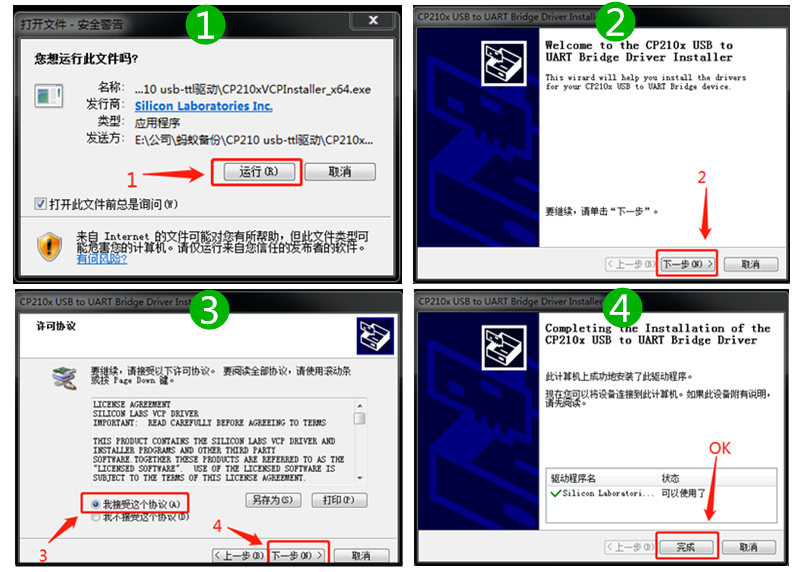
First install the USB driver, the following picture can be used as a reference:
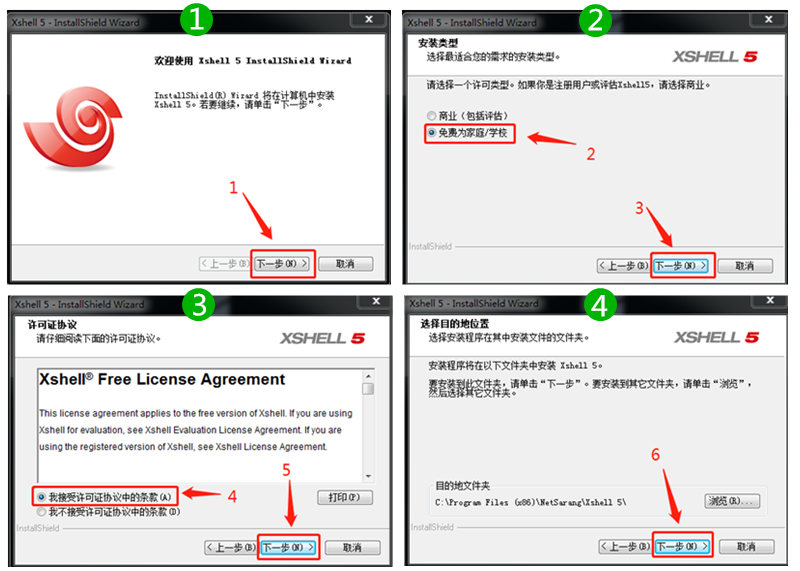
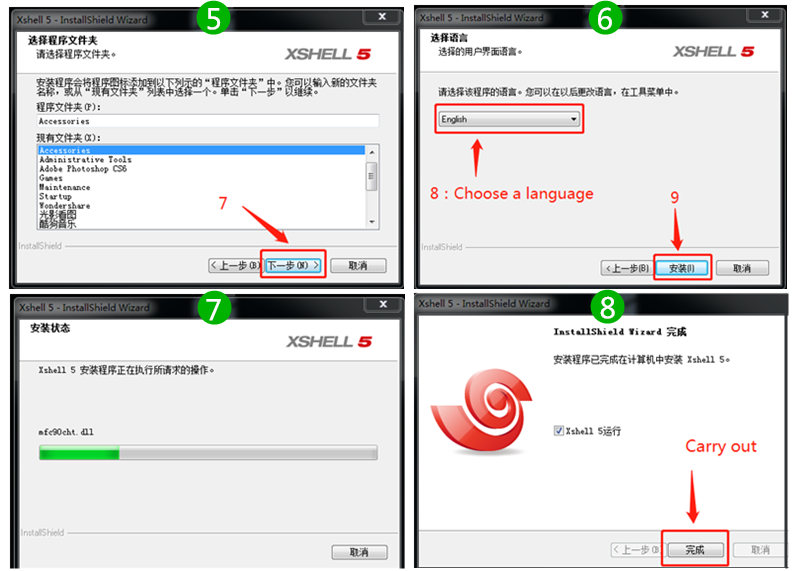
Then install Xhsell, the following picture can be used as a reference:
(During the installation process, you can choose the language)
After the installation is complete, connect the USB port of the test fixture to the computer (do not turn on the power), find and record the USB port number in the computer device management.

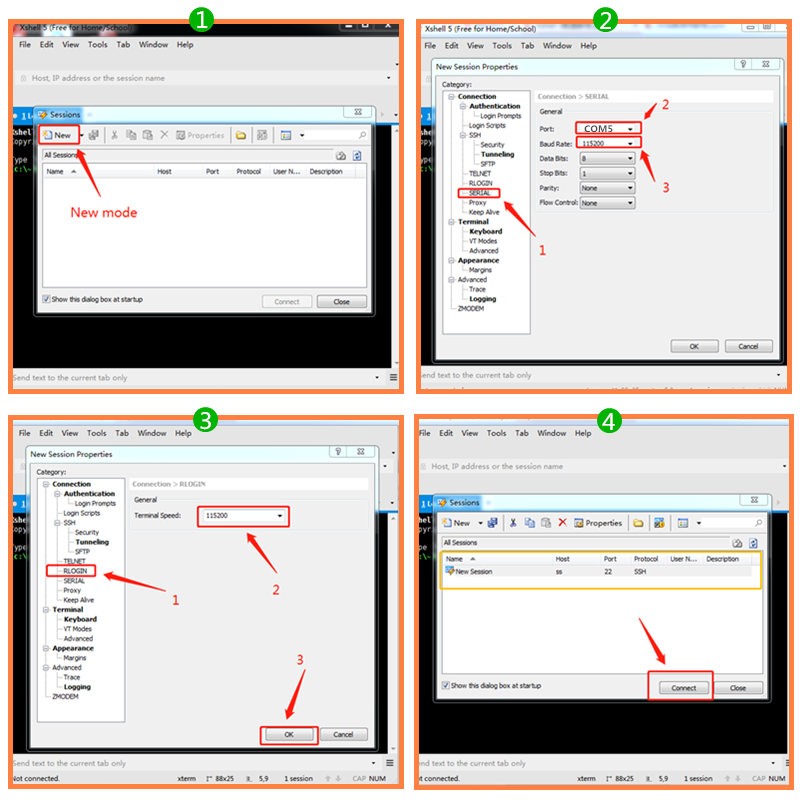
Then run Xshell to start configuring software parameters:
Please refer to the picture below for the setup steps
Note the key parameters:
1: Port – the corresponding USB port number
2: Baud Rate -115200
3: Terminal Speed -115200
Then turn on the power of the test fixture, and the software starts self-checking. After the self-test is completed, you can use the test fixture to test the hash board.
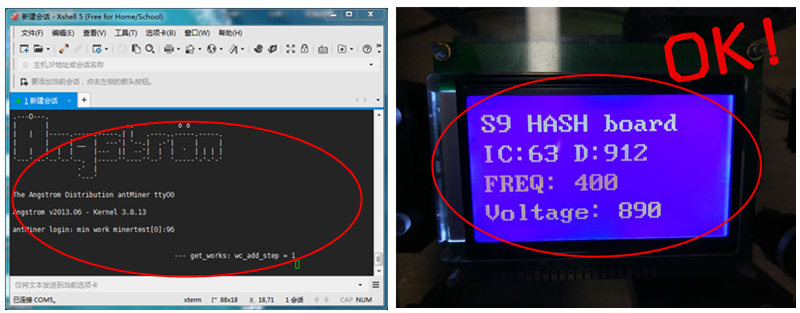
The data shown in this figure takes S9 as an example. Different TF card programs will display different data.
At the same time, XSHELL will also have relevant information prompts. For example, if you see the following page, it means you can test the hash board.
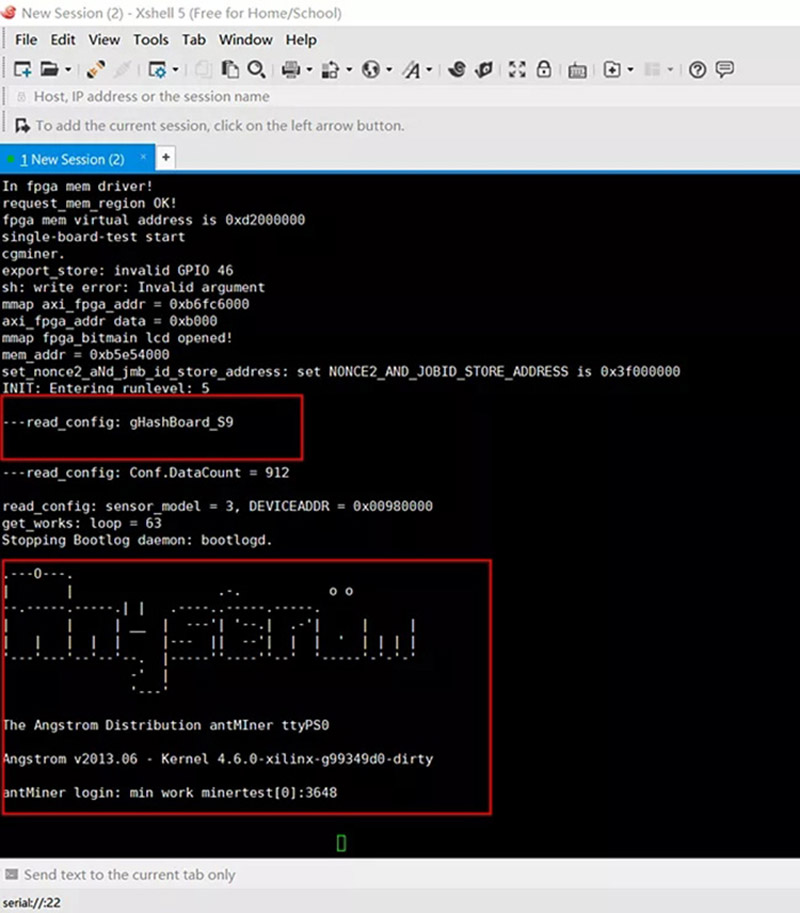
You can check that the device is in good condition by pressing the “Test” button of the test fixture. For example, if there is no Hash board, XSHELL will prompt “NO Hash board”.
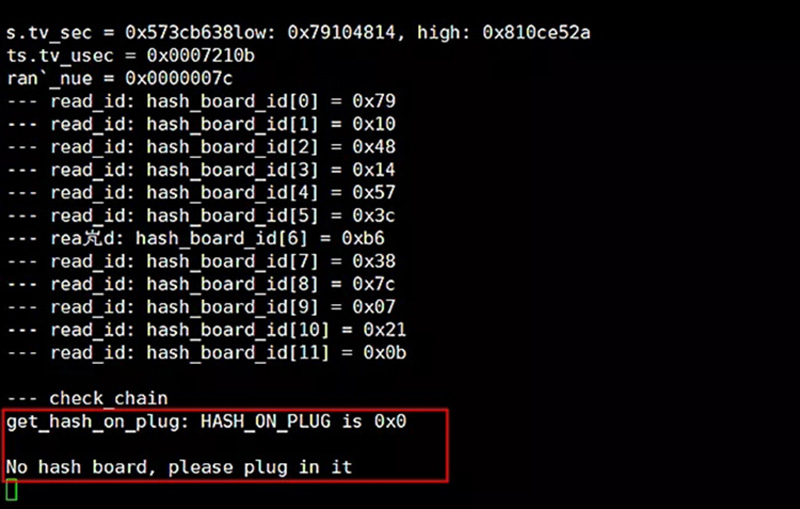
If a good hash board is attached, a full hash board scan will be performed until the scan is finally completed. But if you insert a damaged hash board, the test will show the serial number of the damaged chip.
So far, congratulations on completing all the test fixture software program configuration and debugging.
本文标签: